How to export your Mod for GIANTS Editor

How to export your Mod for GIANTS Editor
You’re ready to get your model in GIANTS Editor so you can include it with your mod and ultimately play with it in Farming Simulator. What you need is the ability to export that model in a format that GIANTS Editor understands, either I3D or FBX. Farming Simulator includes some exporter plugins for three of the main 3D suites used by modders: Blender, Maya, and 3ds Max. You can find them in the SDK folder where you’ve installed Farming Simulator (on Windows, this is something like C:\Program Files\Farming Simulator 2025\sdk).
This tutorial walks you through exporting your model from these programs into a format usable by GIANTS Engine.
Despite the fact that those exporter plugins come with Farming Simulator, you should also look at the GIANTS Developer Network (GDN) website. You can usually find more updated versions of the exporter plugins than the ones that ship with Farming Simulator.
Exporting from Blender
Blender is my favorite 3D content creation program. It’s very powerful, lightweight, free, and open source. If you’re just getting started with modding, Blender is a low-cost way to get your feet wet without being concerned that you’ll blow through a 30-day free trial period. I am immensely pleased to know that GIANTS Software maintains an I3D exporter add-on for Blender.
These sections give you the lowdown on just what you need to know when exporting your mods from Blender.
Installing the I3D exporter add-on
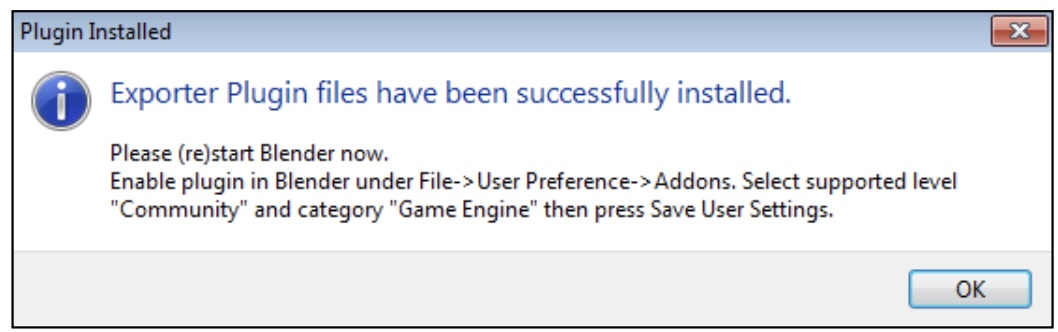
An installer simplifies the process of getting the add-on to appear in Blender. You just run the installer executable, assuming you’re using Windows. You can find the installer in the SDK folder where the Farming Simulator is installed on your computer (or your Downloads folder if you have the latest version from the GDN). The filename of the installer should be something like blender_i3d_ export_6.0.0.exe. The image below shows what it looks like when you run it.
If the installer can find where you have Blender installed, it shows it as a checkbox option in the installer window.
If you have multiple versions of Blender installed, you can even pick which ones you want to install the add-on. Click the Install button, and when the installer finishes, it pops up a dialog to let you know the installation was successful, as shown:
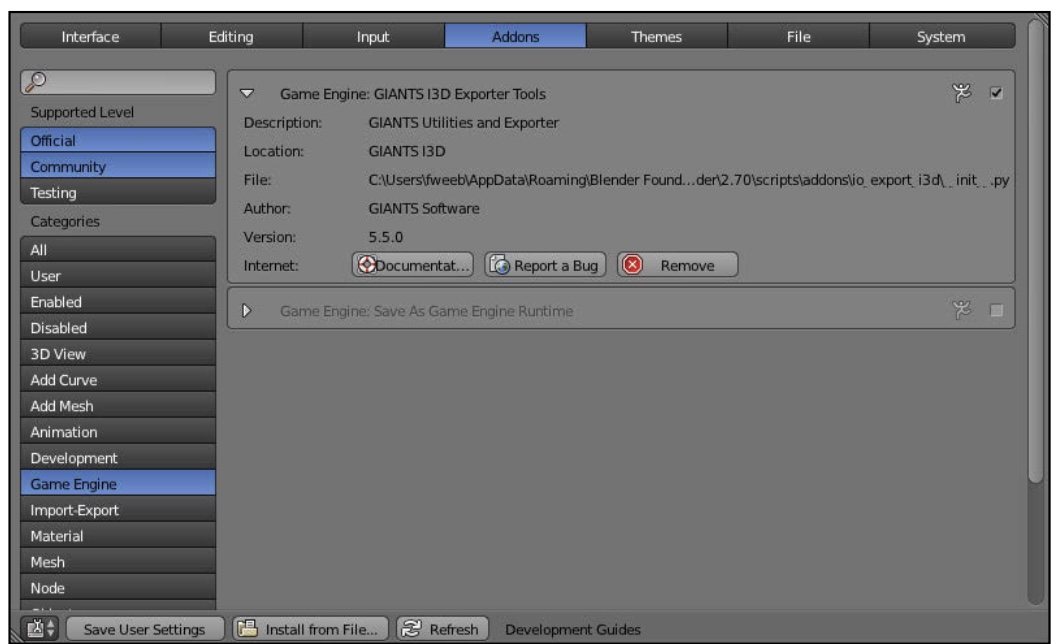
To enable the add-on within Blender, start Blender and go to User Preferences (File➪User Preferences or use the Ctrl+Alt+U hotkey combination). In the Addons section, go to the Game Engine category. You should see an add-on named GIANTS I3D Exporter Tools. Click the triangular icon to the left of the name to expand it and see more information about the add-on, including buttons for documentation and bug reporting. You should see something similar to the image:
Enable the GIANTS I3D Exporter Tools add-on by clicking the checkbox to the far right of its name in User Preferences. For convenience, you may also want to click the Save User Settings button at the lower left of User Preferences. That way, the addon is automatically enabled whenever you start Blender, and you don’t have to manually enable the addon every time you want to use it.
Exporting your mod
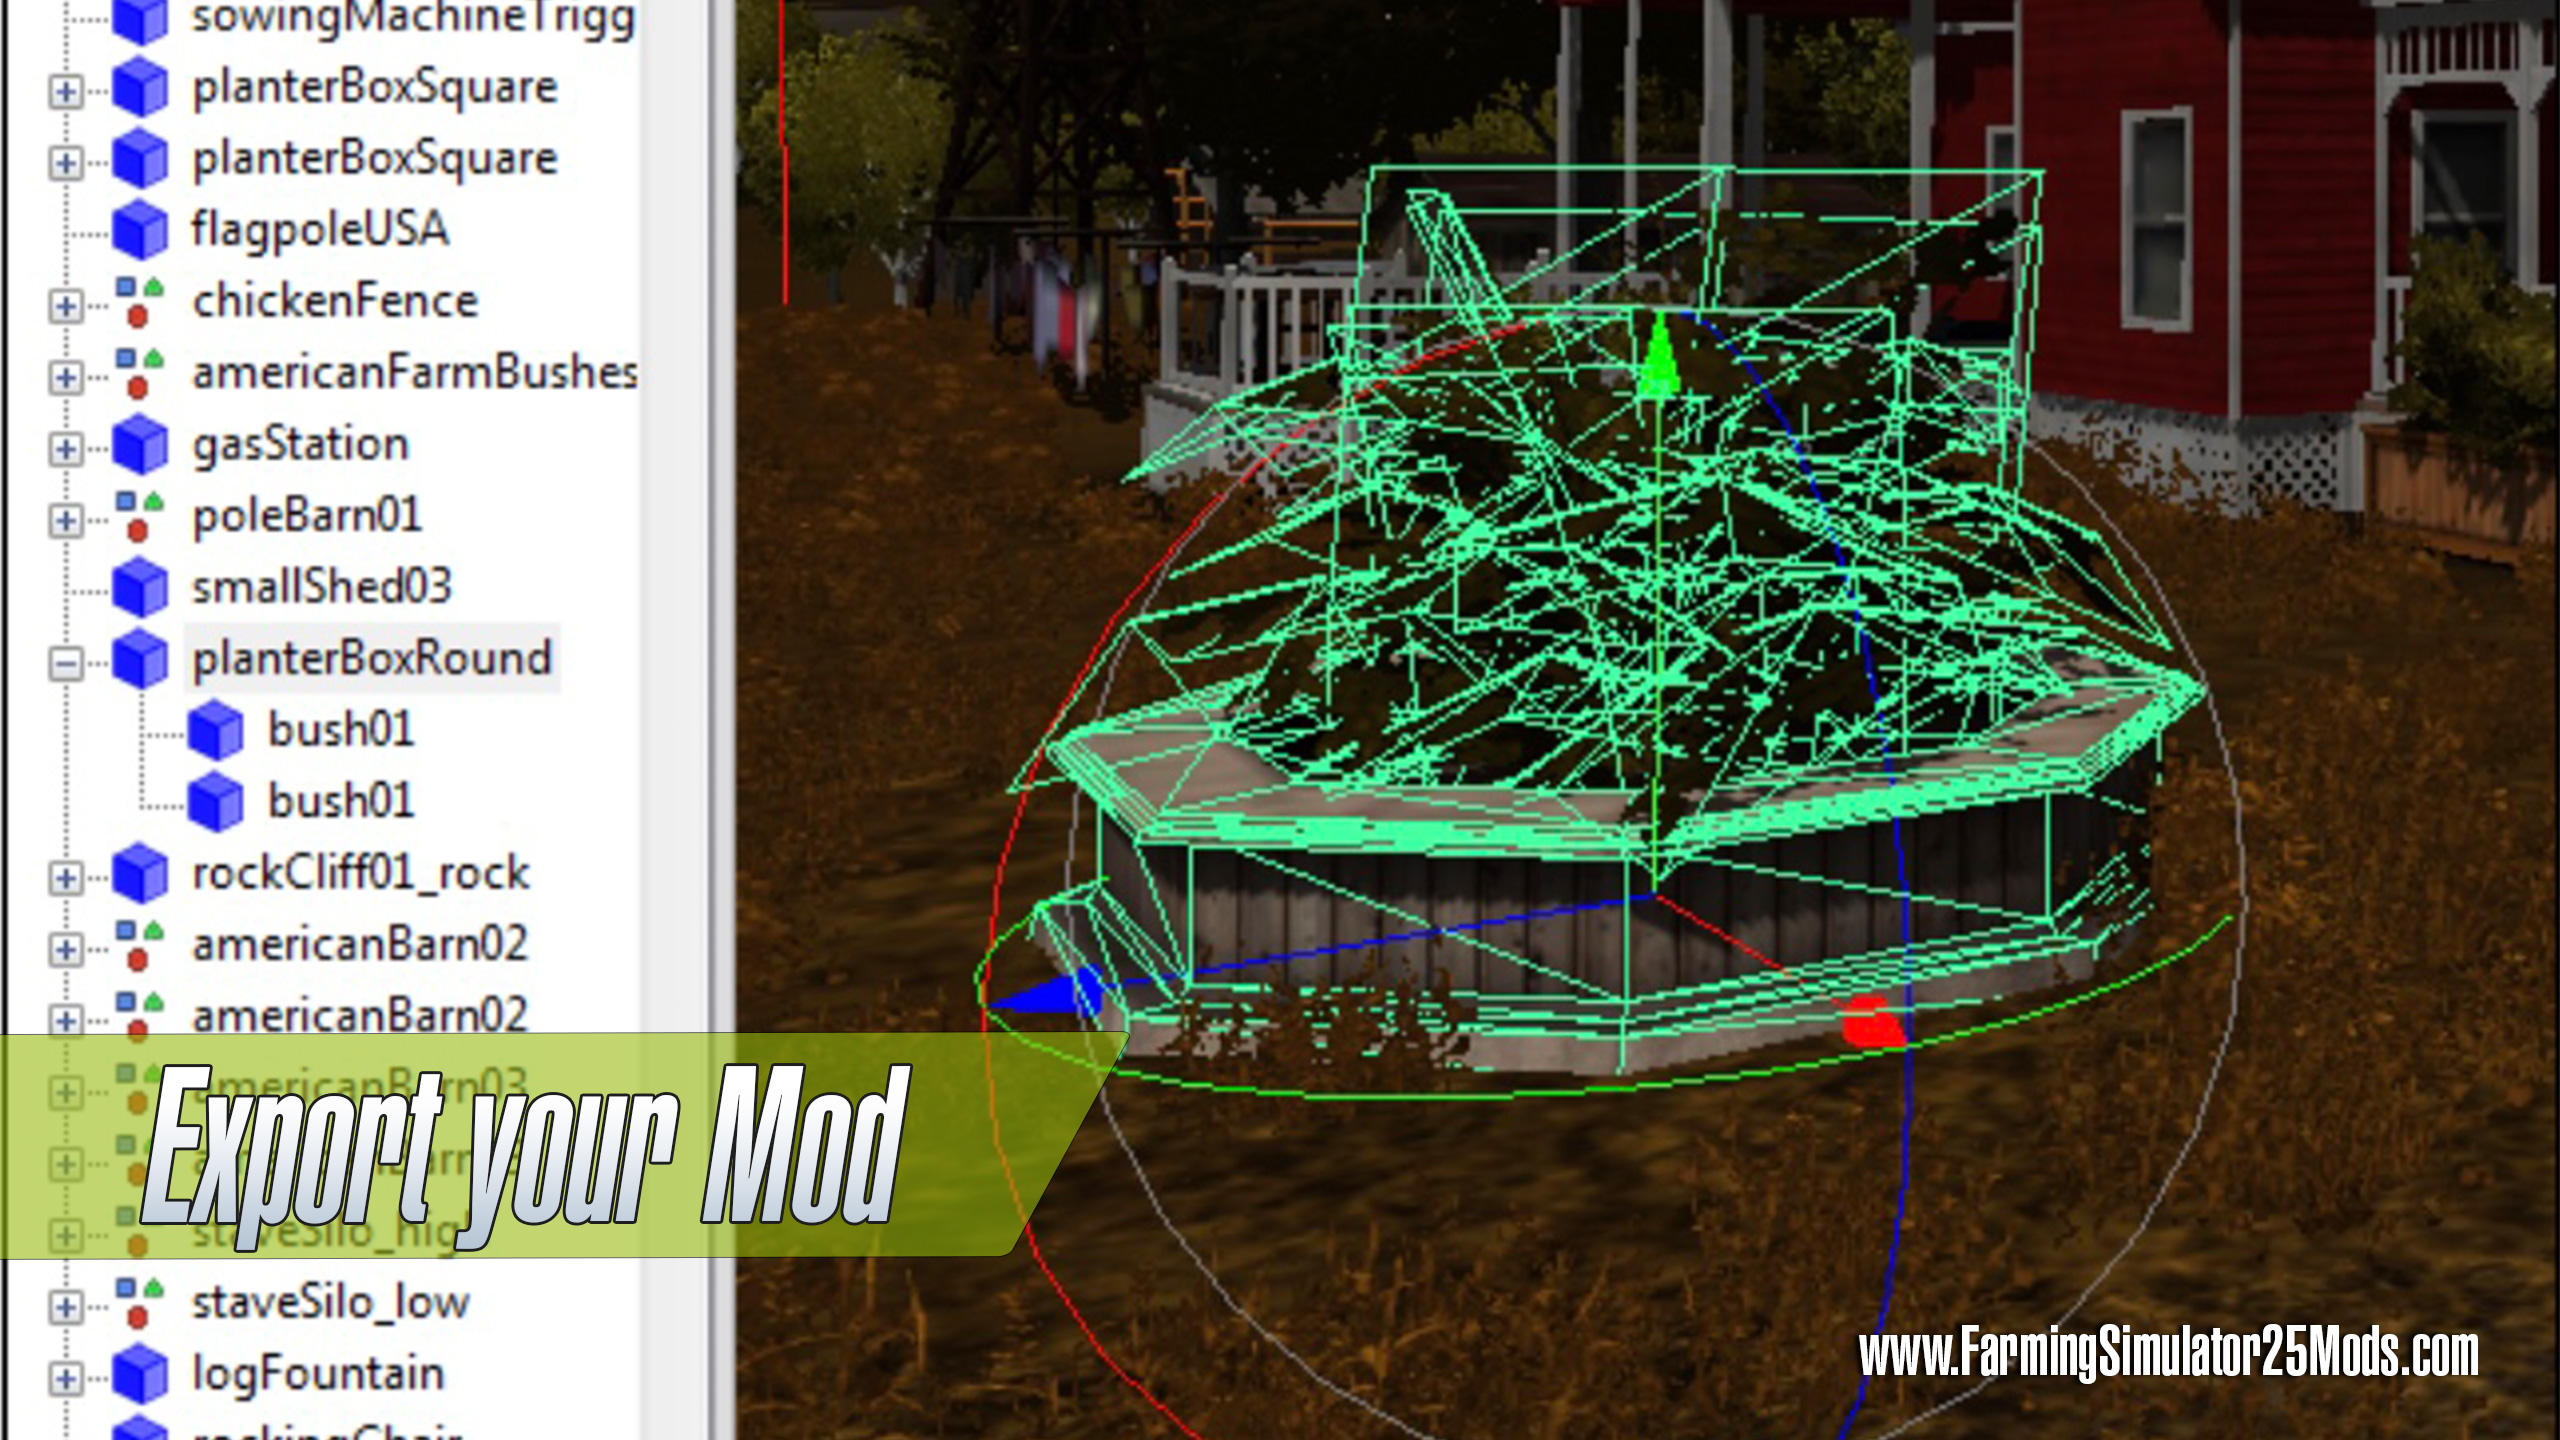
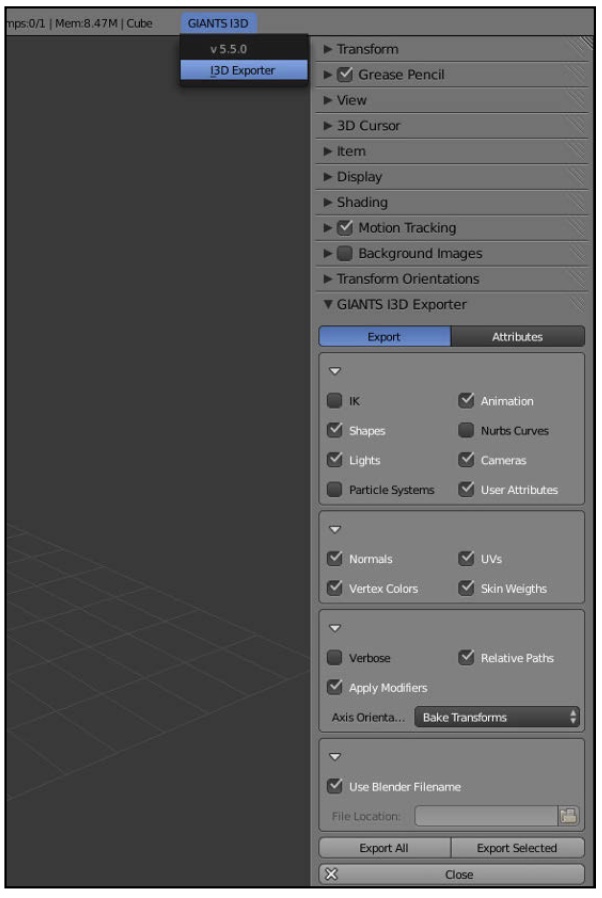
With the GIANTS I3D Exporter Tools add-on installed and enabled in Blender, you can finally get your scene ready for GIANTS Editor. The GIANTS exporter is very different from most exporters in Blender. It doesn’t appear in the File➪Export menu. Instead, look to the far right of the Info editor’s header (typically at the top of the Blender window) to see the text that reads GIANTS I3D. Click that text and click I3D Exporter from the menu that appears. In the 3D View’s Properties region, a GIANTS I3D Exporter panel appears.
There are two subsections:
- Export: The subpanels in the Export section contain options relevant to the overall export process, including the ability to choose the types of objects to export and your export filename.
- Attributes: The Attributes section gives a series of options pertaining to the currently active object, much like the Attributes panel in GIANTS Editor.
The image shows the options available in the GIANTS I3D Exporter panel.
For the most part, you should be fine with the default settings. At the bottom of the Export section are two buttons: Export All and Export Selected. The former exports your whole Blender scene into an I3D file, whereas the latter only exports the currently selected objects. In either case, the default behavior exports to an I3D file that shares the same name as your .blend file.
The Blender exporter add-on doesn’t currently support all the features of the I3D format. Animations and vertex weighting, in particular, don’t currently work.
Exporting from Maya
Autodesk’s Maya is probably the most commonly used 3D digital content creation (DCC) tool in the video game industry at this time. The price tag can be a bit steep for an independent mod maker, but it’s certainly the go-to tool for many professional 3D artists. You can try it with a 30-day trial that you can download from Autodesk’s website.
If you use Maya, the following sections walk you through what you need to know to install and use the Maya I3D exporter plugin.
Installing the I3D exporter plugin
Installing the Maya I3D exporter plugin is a simple process. An installer handles the whole thing for you.
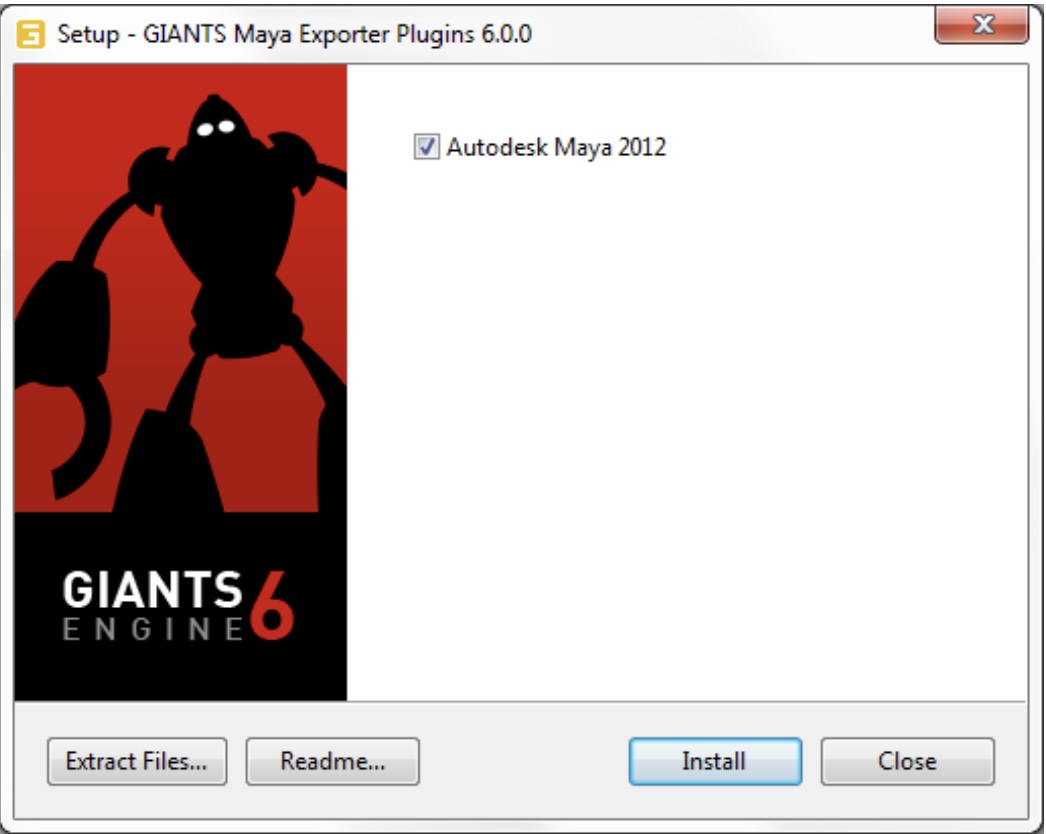
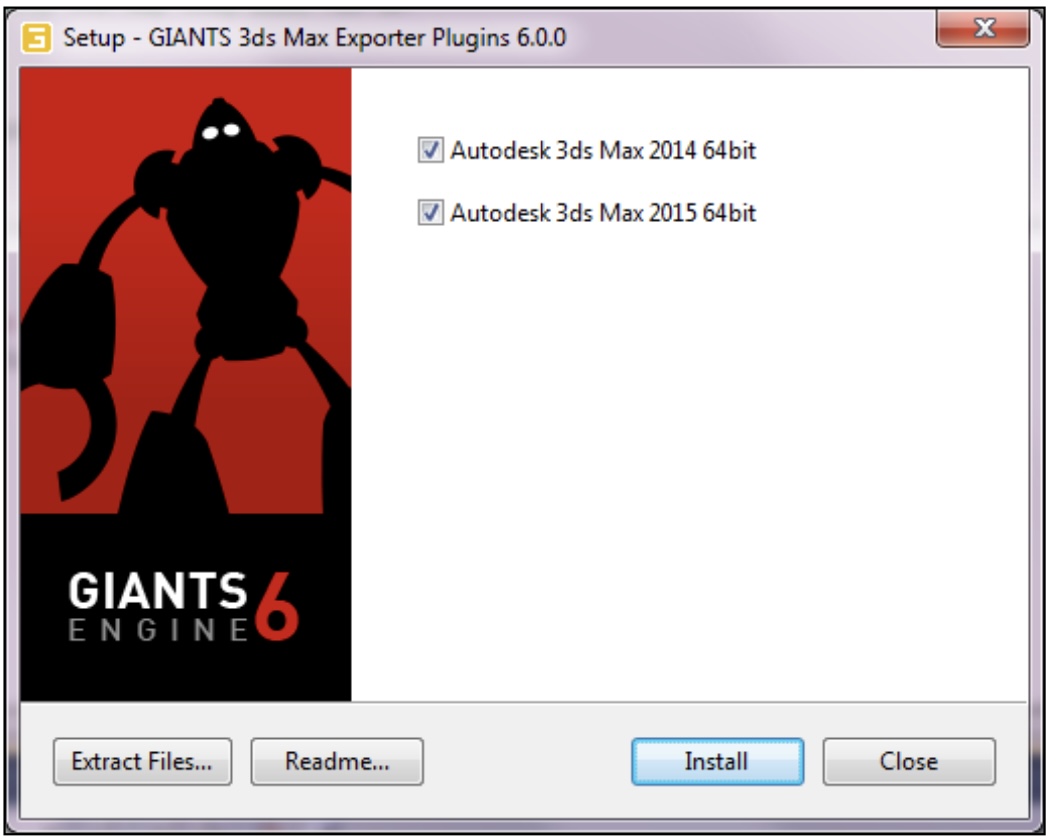
You can find the installer in the SDK folder where Farming Simulator is installed on your computer (or your Downloads folder if you got the latest version from the GDN). The file- name of the installer should be something like maya_i3d_export_6.0.0.exe. When you run it, you should get a window like the one in the image below.
The installer should be able to detect where you have Maya installed on your computer and offer a checkbox for that location. Assuming it’s correct, click the Install button.
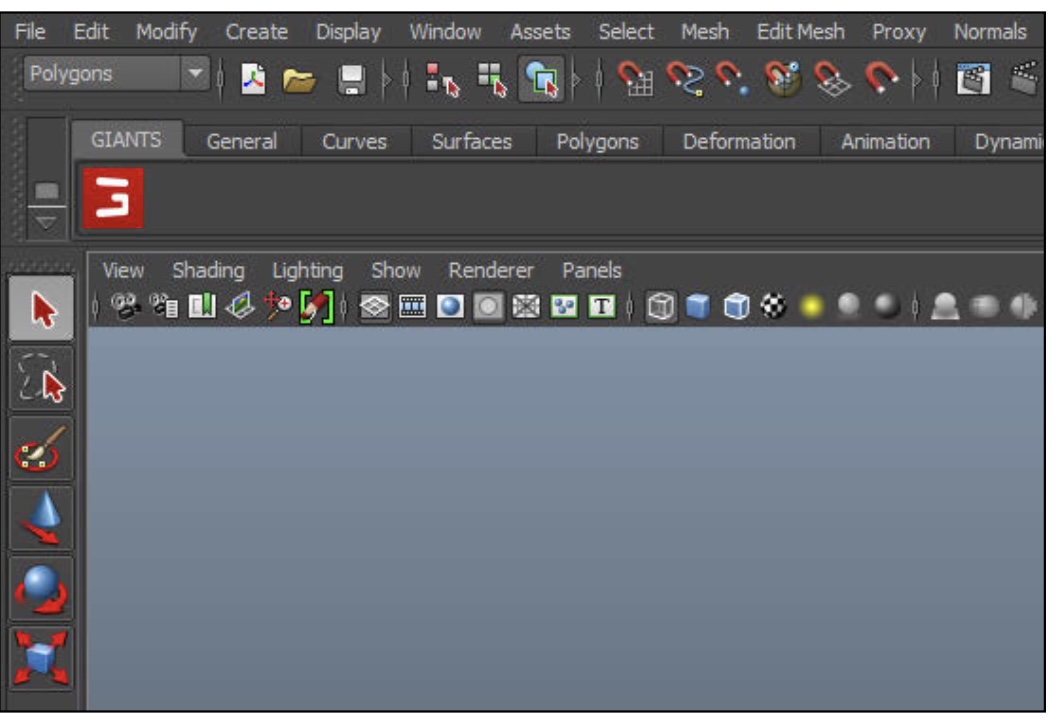
After the installer finishes, start (or restart) Maya. You should notice a custom shelf named GIANTS. On that shelf is an icon for GIANTS I3D Tools, as shown in the image:
Note that in the image above, the shelf has been shifted to the far left. When first installed, the GIANTS shelf appears on the far right after Maya’s Custom shelf.
Exporting your mod
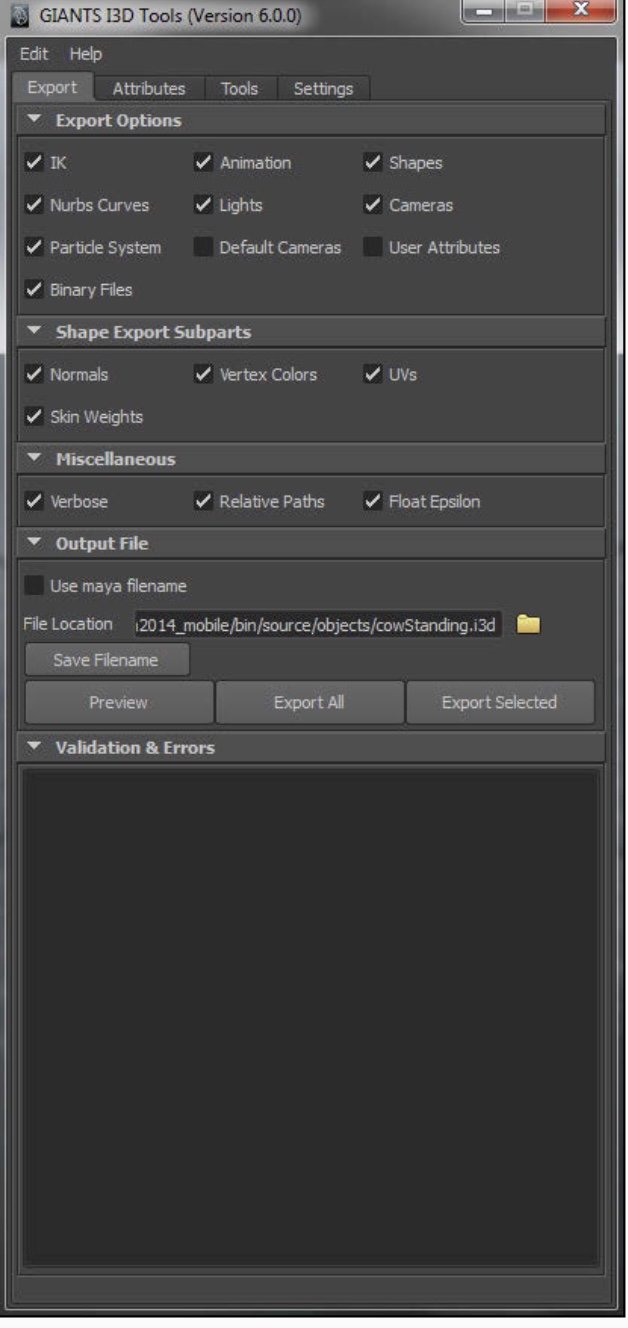
To export your mod from Maya so that GIANTS Editor can load it, click the GIANTS I3D Tools icon on the GIANTS shelf. This brings up the GIANTS I3D Tools dialog, as shown in the image:
You may notice a lot of options and settings spread across four different tabs. Going through these options in great detail is outside the scope of this book. However, generally speaking, you can leave all options at their default values. You absolutely must make one change, which is in the Output File section of the Export tab. You need to set the File Location, which is the location on your hard drive where the exporter puts the I3D file. You can manually type in that path, but the easier way is to click the folder icon to the right of the File Location text field and use the file browser to specify where the file goes. Typically, this location is the folder where your mod is.
With the File Location set, just click the Export All button, and the whole scene is exported as an I3D file that you can open in GIANTS Editor.
Exporting from 3ds Max
3ds Max is the old standby of 3D digital content creation (DCC) for video games. Though its popularity has waned a bit in recent years, Autodesk’s old soldier still commands an impressive segment of the professional DCC market, especially as it pertains to the video game industry.
It’s a bit costly for independent and hobbyist modders, but if you have a license for 3ds Max, you can’t go wrong with it. You can download a 30-day trial from Autodesk’s website if you want to test it. These sections take a closer look at using 3ds Max when exporting your mods.
Installing the I3D exporter plugin
GIANTS Software has an installer that dramatically simplifies the process of getting the I3D exporter plugin to work in 3ds Max. You can find the installer in the SDK folder where the Farming Simulator is installed on your computer (or your Downloads folder if you got the latest version from the GDN). The file name of the installer should be something like max_i3d_export_6.0.0.exe. When you run it, you should get a window like the one in:
The installer should be able to find where you’ve installed 3ds Max on your computer and provide a checkbox to ensure that’s where you want the plugin to go. Click the Install button. When the installation is complete, you can start or restart 3ds Max to use the exporter.
Exporting your mod
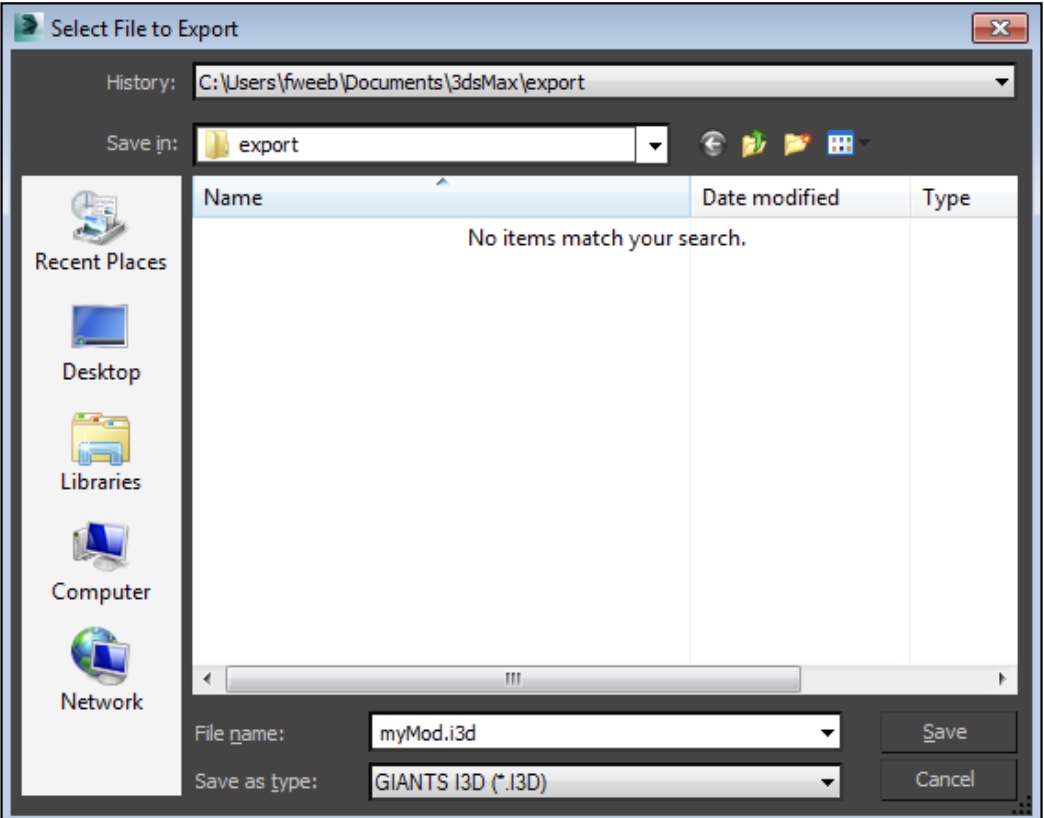
The exporting process for 3ds Max is very straightforward. Click on the Max button in the upper-right corner of the window and go to the Export menu item. You can either export the whole scene or just export the current selection. Which one you choose depends mostly on the nature of your mod. If you’re not sure, just choose to export the whole scene.
After you click Export, 3ds Max produces a file browser dialog for you to pick where on your hard drive your scene should be exported. Navigate to the folder of your custom mod and type in a name for your file. Remember: You need to choose the GIANTS I3D (*.I3D) option from the Save as type drop-down menu. Figure 8-9 shows what your file browser dialog should look like in 3ds Max.
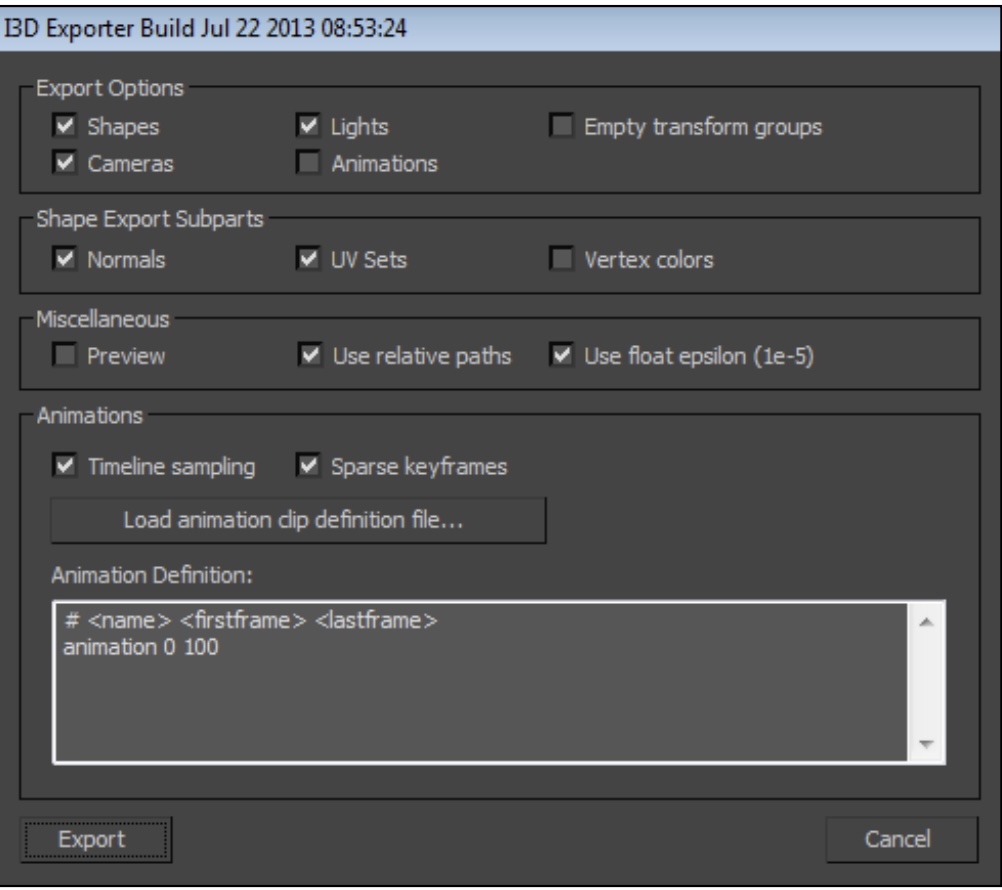
After you pick where to export and set the file type to I3D, click the Save button. Another dialog opens wit a series of options for controlling how your scene is exported. In the simplest cases, you can keep all options at their default values. Figure 8-10 shows the 3ds Max I3D Exporter dialog.
When you’re satisfied with the settings in the exporter dialog, click the Export button to have an I3D file ready for opening in GIANTS Editor.
Exporting with FBX
New to GIANTS Editor 10.0 is another way to use 3D content out of Blender, Maya, 3ds Max, and even a few other DCC applications. GIANTS Editor supports the FBX file format, an interchange format owned by Autodesk.
FBX is available as an export option for nearly all modern 3D DCC tools. Granted, some programs support FBX more completely than others, but if you’re using a program that doesn’t have an I3D exporter, such as Modo, Cinema4d, or Softimage, FBX is the best option you have available. In some cases, like if you’re using Maya LT, which is a lightweight version of Maya geared specifically toward producing video game assets, FBX is your only export option (GIANTS Editor doesn’t yet support the OBJ format).
Consult the documentation of your 3D program to get specifics on how much of the FBX format is supported and the exact steps you take to export. That said, the following outlines the basic steps for exporting to FBX in Blender, Maya, and 3ds Max:
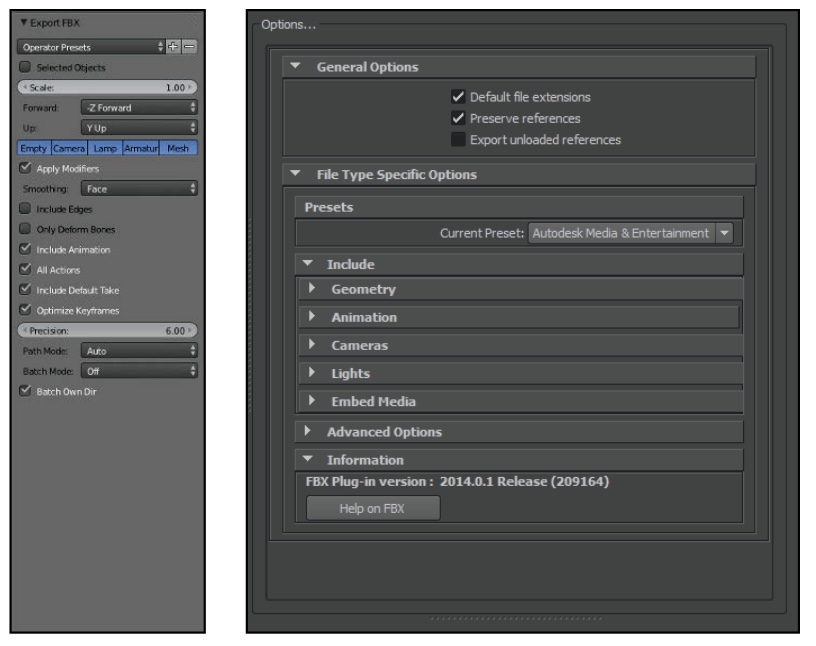
- Blender: Make sure you have the FBX exporter add-on enabled (it’s enabled by default). Then, choose File➪Export➪Autodesk FBX (.fbx) from the menu. Options for the FBX format are available on the left region of the File Browser.
- Maya: Choose File➪Export All from the menu and set the Files of type drop-down menu to FBX export from the file browser dialog. Options for the FBX format are available on the right side of the file browser dialog.
- 3ds Max: Click the Max button and choose Export➪ Export. From the file browser dialog, set your output destination and pick Autodesk (*.FBX) from the Save as type drop-down menu. When you click Save, a new dialog window appears with options for exporting to the FBX format.
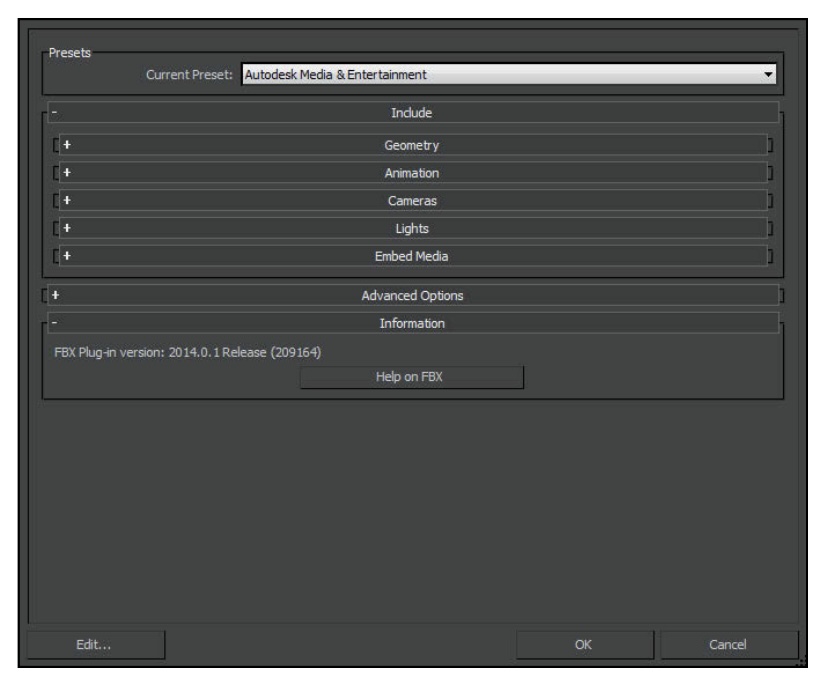
The image below shows the various FBX configuration options in each of these three programs.
How to import your Mod into GIANTS Editor
You’re now ready to get your files into a proper FS25 mod. If you exported an I3D file, you can immediately test the export by opening it directly in GIANTS Editor. You can either double-click the file in your operating system’s file manager (Windows Explorer in Windows, Finder in Mac OS X) or you can open the file from within GIANTS Editor using the File menu (File > Open).
The more common scenario is that you’ve already started a mod and you’re pulling more 3D content into it. For that, the preferred method is to use File➪Import from the menu in GIANTS Editor. Doing so brings up a file browser dialog that allows you to choose either an I3D or FBX file to bring into your scene. Simply navigate to the file you want, select it, and click the Open button. Assuming the I3D or FBX file is properly formatted (if it’s not properly formatted, you’ll get an error and you’ll need to try to reexport your model, probably with different options enabled), you should see your 3D object open and viewable in GIANTS Editor.
If you open or import an I3D file and you only see a black silhouette of your object, don’t worry. Nothing is broken. You just need to add a light to your scene (Create➪Light) to make the surface materials and textures of your 3D object visible within the editor.
Download I3D exporter export add-on.
Author: farmingsimulator25mods.com